fbpx
Back

Please enter your username or email address.
You will receive a link to create a new password via email.

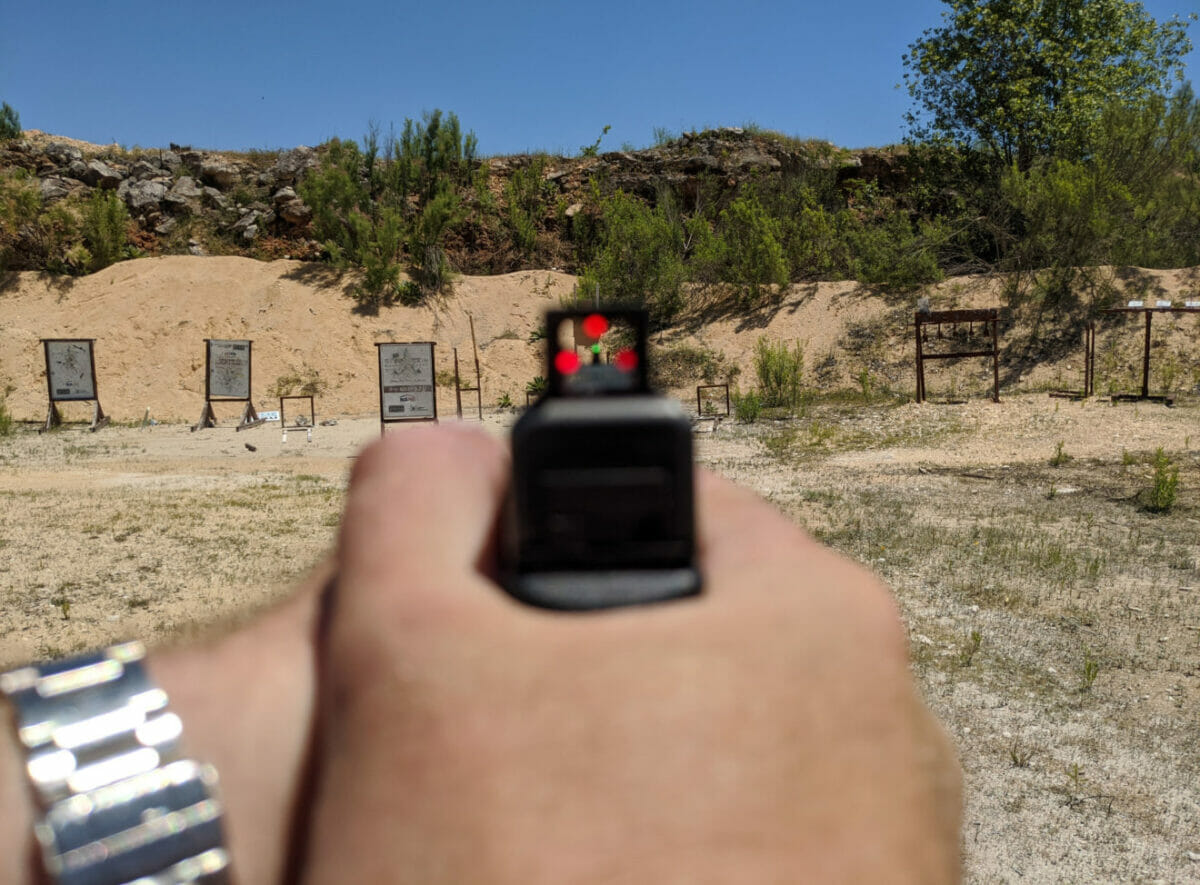
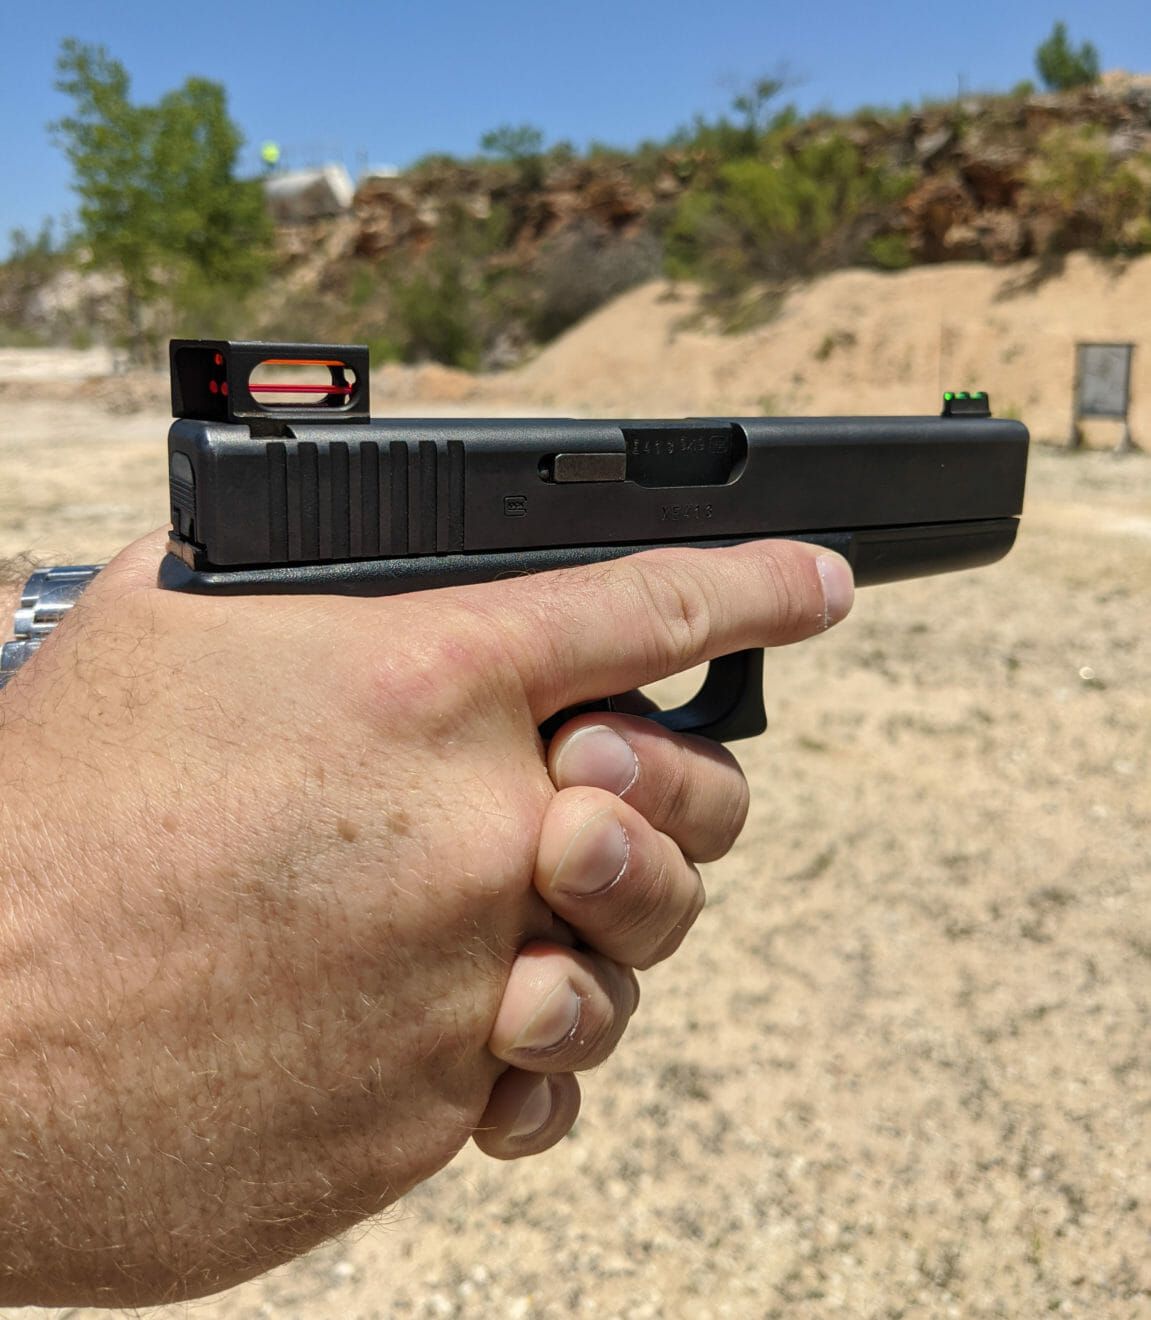
Triclops Sights Review: New Sights for Old Glock

When walking the halls of SHOT Show 2020, we came across some interesting pistol sights. The Triclops Sights seemed unorthodox, unlike any other sights on the market. After SHOT, several influencers made comments on the Triclops on social media, but none had tried the sights for themselves. We reached out to Sean Wyka to try out a set and see how they perform for ourselves. 

A New Way of Seeing

My Gen 2 Glock has been around the block a couple of times and has had two different sets of sights since the factory set. The gun has been in my possession since the late 80s, and it keeps going without issue. 

Triclops sight
The Warren Tactical competition sights have been on my Glock for about 8 years.

The sights that were on the gun before I installed the Triclops were some Warren Tactical competition sights with a fiber optic front and plain black rear sight. These sights were fine, but they didn’t clear silencers, and the black rear sight blended in too much. It left a lot to be desired. One thing that interested me about the Triclops was the fiber optic rear sight and how the entire system would perform with a silencer.

The premise of the Triclops is a rear sight with three dots instead of two. The addition of the top dot allows you to align your front sight quicker than the traditional two-dot rear.

Triclops states that the sights “Utilize geometry and shape for superior integration with human visual dynamics. The unique physical design promotes two eyes open sighting, accelerated target acquisition, proper head alignment, and other attributes critical to exceptional shooting. The Triclops hood discourages the non-dominate eye from interfering with target acquisition, enabling the shooter to keep both eyes open to scan for threats.”

Triclops sight
Triclops sight alignment

Sean Wyka, the owner of Triclops Sights, has been shooting since he was seven years old. His grandfather was a gunsmith, and tinkering with firearms is in his DNA. A couple of years ago, while teaching his wife to shoot, he saw that she had a difficult time keeping both eyes open. Wyka thought about how he could help her overcome this challenge, and the Triclops Sights were born. 

The rear sight is cut at an angle so that the eyes don’t focus on the frame but the fiber optic dots. This setup works because the left side of the frame is slightly out of focus, and your eyes are drawn to the dots instead.

Installation of the Triclops

Triclops sight
The Triclops sights come in a Altoids size tin with installation instructions.

The Triclops Sights come as a front and rear set with ten fiber optic rods. The rod colors are red, green, orange, and yellow to allow the end-user to customize what colors go where. The color setup that I chose is green for the front sight, orange for the top rear sight, and red for the left and right on the rear sight. I’ll cover more about how this pattern performed at the range below.

Triclops sight
The sights and fiber optic rods from Triclops.

The instruction card that comes with the sights recommends not to use a sight aligning tool, but to use a brass hammer and brass punch to install the sights. I ordered a punch kit with a hammer and decided to install the sights myself instead of having a gunsmith install them. 

There are a few things that help make this easier, and I recommend having them before getting started. I’ll cover each as needed.

  • A hockey puck 
  • Wheeler 72 Piece Professional Gunsmithing Screwdriver Set
  • Loctite 242 (blue)
  • HORUSDY 19-Pieces Gunsmith Punch Set and Hammer with Brass
  • Allen key set
  • Calipers
  • Small fingernail clippers
  • Grill lighter

The first thing to tackle was the front sight since that would be the easiest. The Wheeler 72-piece gunsmithing set comes with a Glock front sight removal tool, or you can pick one up separately.

With the slide off the gun, remove the barrel and guide rod, then flip the slide over and lay the top on your hockey puck. This will allow you to access the screw for the front sight. Be very careful and slow to avoid striping the head on the screw when removing the front sight and installing the new one. 

The front sight will only look correct in one direction. If placed on backward, then the sight will hang off the front of the slide. After removing the front sight, install the new one in reverse order. Put a small drop of blue Loctite on the screw before installing. Make sure that you don’t use high strength Loctite since you might want to change your sights at some point. 

Triclops sight
The front sight screw and tool.

After installing the front sight, I moved on to the rear sight removal and installation. Using the hockey puck, place the slide on its side; then, using the brass punch and hammer, drift the sight out of the slide. It doesn’t matter from which side you remove the sight.

Note: check if your rear sight has set screws in the top that will need to be removed before you drift the rear sight. Most aftermarket sights have set screws to help keep them in place.

Triclops sight
The rear sight has been removed. The brass left from the punch is removed with gun lube or rubbing alcohol. You can see the mark in the center from the set screw of the previous sight.
Triclops sight
I removed the front and rear sight before installing the front sight first.

Once you remove the rear sight, it is time to install the new rear sight. It doesn’t matter which side you install the new sight from, but make sure that the sight is facing toward the front. It is easy to tell because if the sight is backward, it will hang off the back of the slide.

Make sure and back out the two set screws in the rear sight before attempting to install the rear sight. Using the same brass punch and hammer, carefully drift the sight back to the center of the slide. Be careful and take your time. You don’t want to slip and damage your sight or the slide of the gun. 

Triclops sight
The rear sight in place before installing the set screws.

Once the sight is where you want it, check with the calipers to make sure the sight is even on the left and right. It might require you to drift the sight to one direction or the other.

After that, install the two set screws using an allen wrench that clears the top of the sight and a small drop of Loctite on the screws. I tried to use the bit in my Wheeler kit and cross threaded the screw on one side. The reason was that the bit hit the top of the sight and slightly canted it to one side.

Triclops sight
The rear sight installed. I only used one set screw but it hold the sight and it isn't going anywhere.

After the front and rear sight are in place, then you can start installing your fiber optic rods. Install one rod at a time to make it easier on yourself. When working on the rear sights, I found it easier to use the lighter and slightly melt the end of the rod at the back of the slide. This way, I could pull it up flush with the rear of the sight and work on the front where it is not under the ledge of the sight.

Triclops sight
Install one fiber optic rod at a time.

For melting the rods, I slowly moved the flame to the rod and then pulled back. Don’t stick the flame right on the rod, or it will catch fire or melt too quickly. If you make a mistake, don’t worry; each rod is more than twice the length that you need. Just clip off the end and start again. 

I tried to make the end of the rod just barely bigger than the hole, so I didn’t have a large dot for the sight picture. Once you have the rod melted on, pull it forward until it is flush with the rear.

Pull the rod tight and make a close cut with the fingernail clippers. Then repeat the procedure with the lighter. Make sure and get the rod as tight as possible within the sight. Do this by melting the rod till the slack is out.

Triclops sight
Fingernail clippers let you get close to the sight and make a straight cut.

After you have one rod installed, be careful not to burn the other rods as you install the last two. Take your time, and if you make a mistake, just cut the rod out and start over.

Triclops sight
All of the fiber optic rods installed in the sights.
Triclops sight
The top rod is orange. Notice the bottom rods have a slightly larger dot than the top. This is because they were melted longer.
Triclops sight
The green front sight is a nice contrast to the read and orange rear sights.

After you have finished installing the fiber optic rods, you can use a small bit of gun oil on a rag and wipe up any soot on the rods. We thought that one rod was darker than the other until we cleaned it off.

Range Time

Since the Triclops sights are a departure from the typical sights on the market, we had to test it out before pronouncing judgment. I invited two friends to the range to test the sights with me and get their opinions. 

Robert shoots competition with an RMR and is very picky about what he uses. Jeb enjoys shooting and has a variety of firearms. Both of them had never seen the Triclops before the range trip. 

I arrived at the range early and shot a little over 300 rounds to establish familiarity with the sight and record my thoughts. Like any new sights, they take some time to get used to. However, by the second mag, it felt normal, and I started to speed up my shooting. 

Driving the gun forward, I notice that I had the barrel a little high, but my eye was drawn to the front sight and the top rear sight. I quickly dropped the nose down, and the sights aligned easily. After the second box of ammo, I could engage some small 4 inch plates in rapid succession. 

After getting used to the sight picture, I attached my silencer. The front sight is not “suppressor height” however the dot of the rear sight is taller than the silencer. Most of the time, when the sights are blocked, people have trouble hitting the target without being able to see through the silencer. I have been shooting with silencers and low sights for years, but I still prefer raised sights. 

Triclops sight
The silencer is an AAC Eco -9 with a slight smaller diameter than most current generation silencers.

The good news is that the Triclops sights make shooting with a silencer very simple. Just align the bottom sights with the front sight and put the top dot right above where you want to hit, and you are good to go. I was surprised by how simple it was to use and how well they perform with a silencer. 

Triclops sight
The view of the sights with the silencer attached.

So what did the other guys think of the sights? Overall they liked it. The only negative they had were the looks. However, after some range time, their minds changed about the looks. 

Shooting the RMR vs. the Triclops — some things became apparent. First, if you are not used to shooting an RMR, the learning curve is greater than the Triclops. Second, the Triclops is faster, especially at close range within seven yards. If the front sight is in the box, you are going to get torso hits. For a self-defense perspective, or for law enforcement, this is a big bonus.

The Triclops sight is not much larger than a factory rear sight height-wise. Compared to an RMR, it is much smaller, less than half the size. 

Triclops sight
The Triclops is about twice the size of a factory rear sight but the RMR is over twice as large as the Triclops.

We tried drawing from a concealed appendix holster and had zero issues. People may assume that the sight will get snagged on clothing when drawing. I can tell you for a fact this is not the case. We tried to drag it across clothing, and it didn’t hinder the draw in any way. 

As far as how well it was able to conceal — since the sight is just a little larger than a factory rear sight, this isn’t an issue. The RMR was much more noticeable than the Triclops. 

Conclusion

The Triclops sights are an all-metal construction and are built like a tank. The rear sight is not going to break or bend. If a fiber optic rod breaks, it can be replaced, but the sight still functions without all the rods. 

Overall, everyone who shot the Triclops was a fan. There are only two criticisms that we were able to come up with. First, the look of the sight is unorthodox, and some people might not like the appearance. Second, if you carry appendix, the sight might rub a bit on one corner. This issue can be fixed somewhat by sanding down that top corner. 

I would say that this sight is not for everyone, but it will work for most people. If you are an RMR fan, then think of this as an analog RMR. If you don’t like the RMR, this sight is faster and has less of a learning curve. 

I give the Triclops a thumbs up, and before you dismiss it, I suggest that you get your hands on it for some range time. Will you purchase one? Maybe not, but the firearm industry doesn’t advance by not taking chances and trying new things. After all, the standard blade and notch sight is over 150 years old; maybe it is time for an upgrade.

Loading more posts ...